Why Do My Digital Photos Look Great on the Camera but Not When I Upload Them to Computer
22 Common photography problems (and how to fix them)
You never have to exist in dubiety always again
Mutual photography problems can actually take the enjoyment out of taking pictures. As ane of the more than technical pastimes you lot can pursue, it tin be pretty disruptive at times.
Whether you're just starting out or have been taking pictures for a while, chances are you keep encountering the same nagging problem. Don't worry though - yous're not solitary and this is where we come in.
We've put together some of the near common photography bug you meet and offered solutions to get round them, so y'all never have to be in incertitude ever again!
We've offered a mix of camera tips, explanations, definitions and more to assistance respond your questions. And nosotros've as well provided links, where appropriate, to some of our photography tutorials covering these problems in more depth.
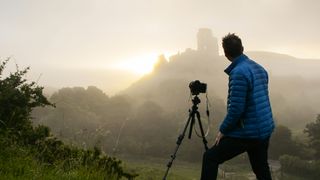
Trouble No. one: Will changing lenses mean I end up with dust on the camera sensor?
So much has been said well-nigh 'grit bunnies' (small particles of dust that tin land on your camera's sensor and cause dots in images) that many DSLR and mirrorless photographers seem paranoid near changing lenses. All the same being able to apply the best lens for any item shot is one of the best attractions to DSLR and mirrorless photography.
Don't be agape to change lenses when y'all demand to, but take a few precautions. Always switch the camera off, as this removes whatever static accuse from the sensor that tin can attract dust particles. Where possible, choose a dust-free, non-windy location when changing lenses too. If that'due south non possible, at least shield yourself from the wind.
Next, go the replacement lens prepare to fit so that you lot don't take to waste material fourth dimension with the camera internals exposed. Finally, continue the camera'southward lens opening pointing downwards when irresolute lenses, to minimise the risk of anything falling into it.
Trouble No. 2: Should I apply a skylight filter on my lens?
Skylight filters have two jobs. I is to reduce the absurd, slightly blue color cast that you might see in some of your shots, peculiarly those taken in shade nether a bluish sky. With the sophisticated white residuum abilities of today's cameras, this is less disquisitional than it was when photographers were using film (especially slide film).
However, skylight filters play a 2d role, protecting the front element of the lens from adventitious scratches and splashes. If your camera resides permanently in an orderly studio, this might not exist an upshot, only if you practise most of your photography in the corking outdoors, it certainly volition be. Replacing a filter is a lot cheaper than writing off a lens!
- Acquire more: 5 essential photography filters
Trouble No. 3: Should I Delete All or Format to remove pictures from a memory card?

Formatting the carte is quicker, so is nearly always the better option. However, if images are 'Protected' during playback, they won't be erased when you printing Delete All but will be wiped if you format the card. You can flag photos every bit 'Protected' past pressing the appropriate button.
Problem No. 4: Should I use Continuous or Automobile Reset for file numbering?
Nosotros tend to stick with the Continuous file numbering option because, fifty-fifty later removing a memory menu, copying the files and then formatting information technology, the numbering system will bear on from where it left off. This is likewise truthful when swapping memory cards. The advantage is that, even over long periods, all of your camera's paradigm files will accept unique file names.
Trouble No. 5: What'south the difference between raw and JPEG paradigm quality settings?

Put simply, it's best to think of JPEGs every bit high-street prints and raw files as negatives. You camera'southward already applied an number of adjustments to a JPEG file, as well as compressing information technology at the same time.
A raw file lets you lot make all those creative choices, assuasive yous to control exposure, white residual, color mode, saturation, dissimilarity, sharpening, besides every bit a host of other settings. Information technology's more time consuming, and yous'll need to apply a raw converter like Photoshop Lightroom, but the results are worth it.
- Learn more than: The A to Z of Photography: Raw
Problem No. half dozen: Should I employ sRGB or Adobe RGB?
The Adobe RGB color infinite was developed to enable the largest gamut when printing an RGB prototype on a CMYK printer. The sRGB colour space ('south' stands for standard) is best for viewing images on a screen or distributing them electronically. It's as well the all-time selection for inkjet press, fifty-fifty if y'all're sending your files to a printing lab.
Problem No. 7: Many of my indoor photos have a nasty yellow bandage. Am I doing something incorrect?

The likely cause of this is an inaccurate white residual. The Auto White Balance setting of DSLRs typically does a good chore of reacting to varying daylight conditions, such as bright sunshine, cloudy skies or shade, but the color temperature of indoor lighting generally falls outside of the range covered. The usual consequence is that interiors lit by general-purpose lights have a nasty yellowish color bandage.
The quickest remedy is to change your photographic camera's white balance setting from Auto to Tungsten (also called Incandescent on some cameras) if you're shooting under standard interior lights, or the Fluorescent setting for strip lighting.
Things go trickier when you have a mix of lighting - when daylight is streaming in through a window and you've got interior room lights switched on equally well, for example. If you have time, yous might desire to experiment with your white balance settings, merely our recommendation would be to shoot in raw. Every bit nosotros've mentioned above, unlike JPEG files, it's easy to modify the color temperature of raw files at the editing stage.
- Larn more: The A to Z of Photography: Kelvin
Problem No. 8: I took some sunset photos, merely they don't look very colorful. Why is this?
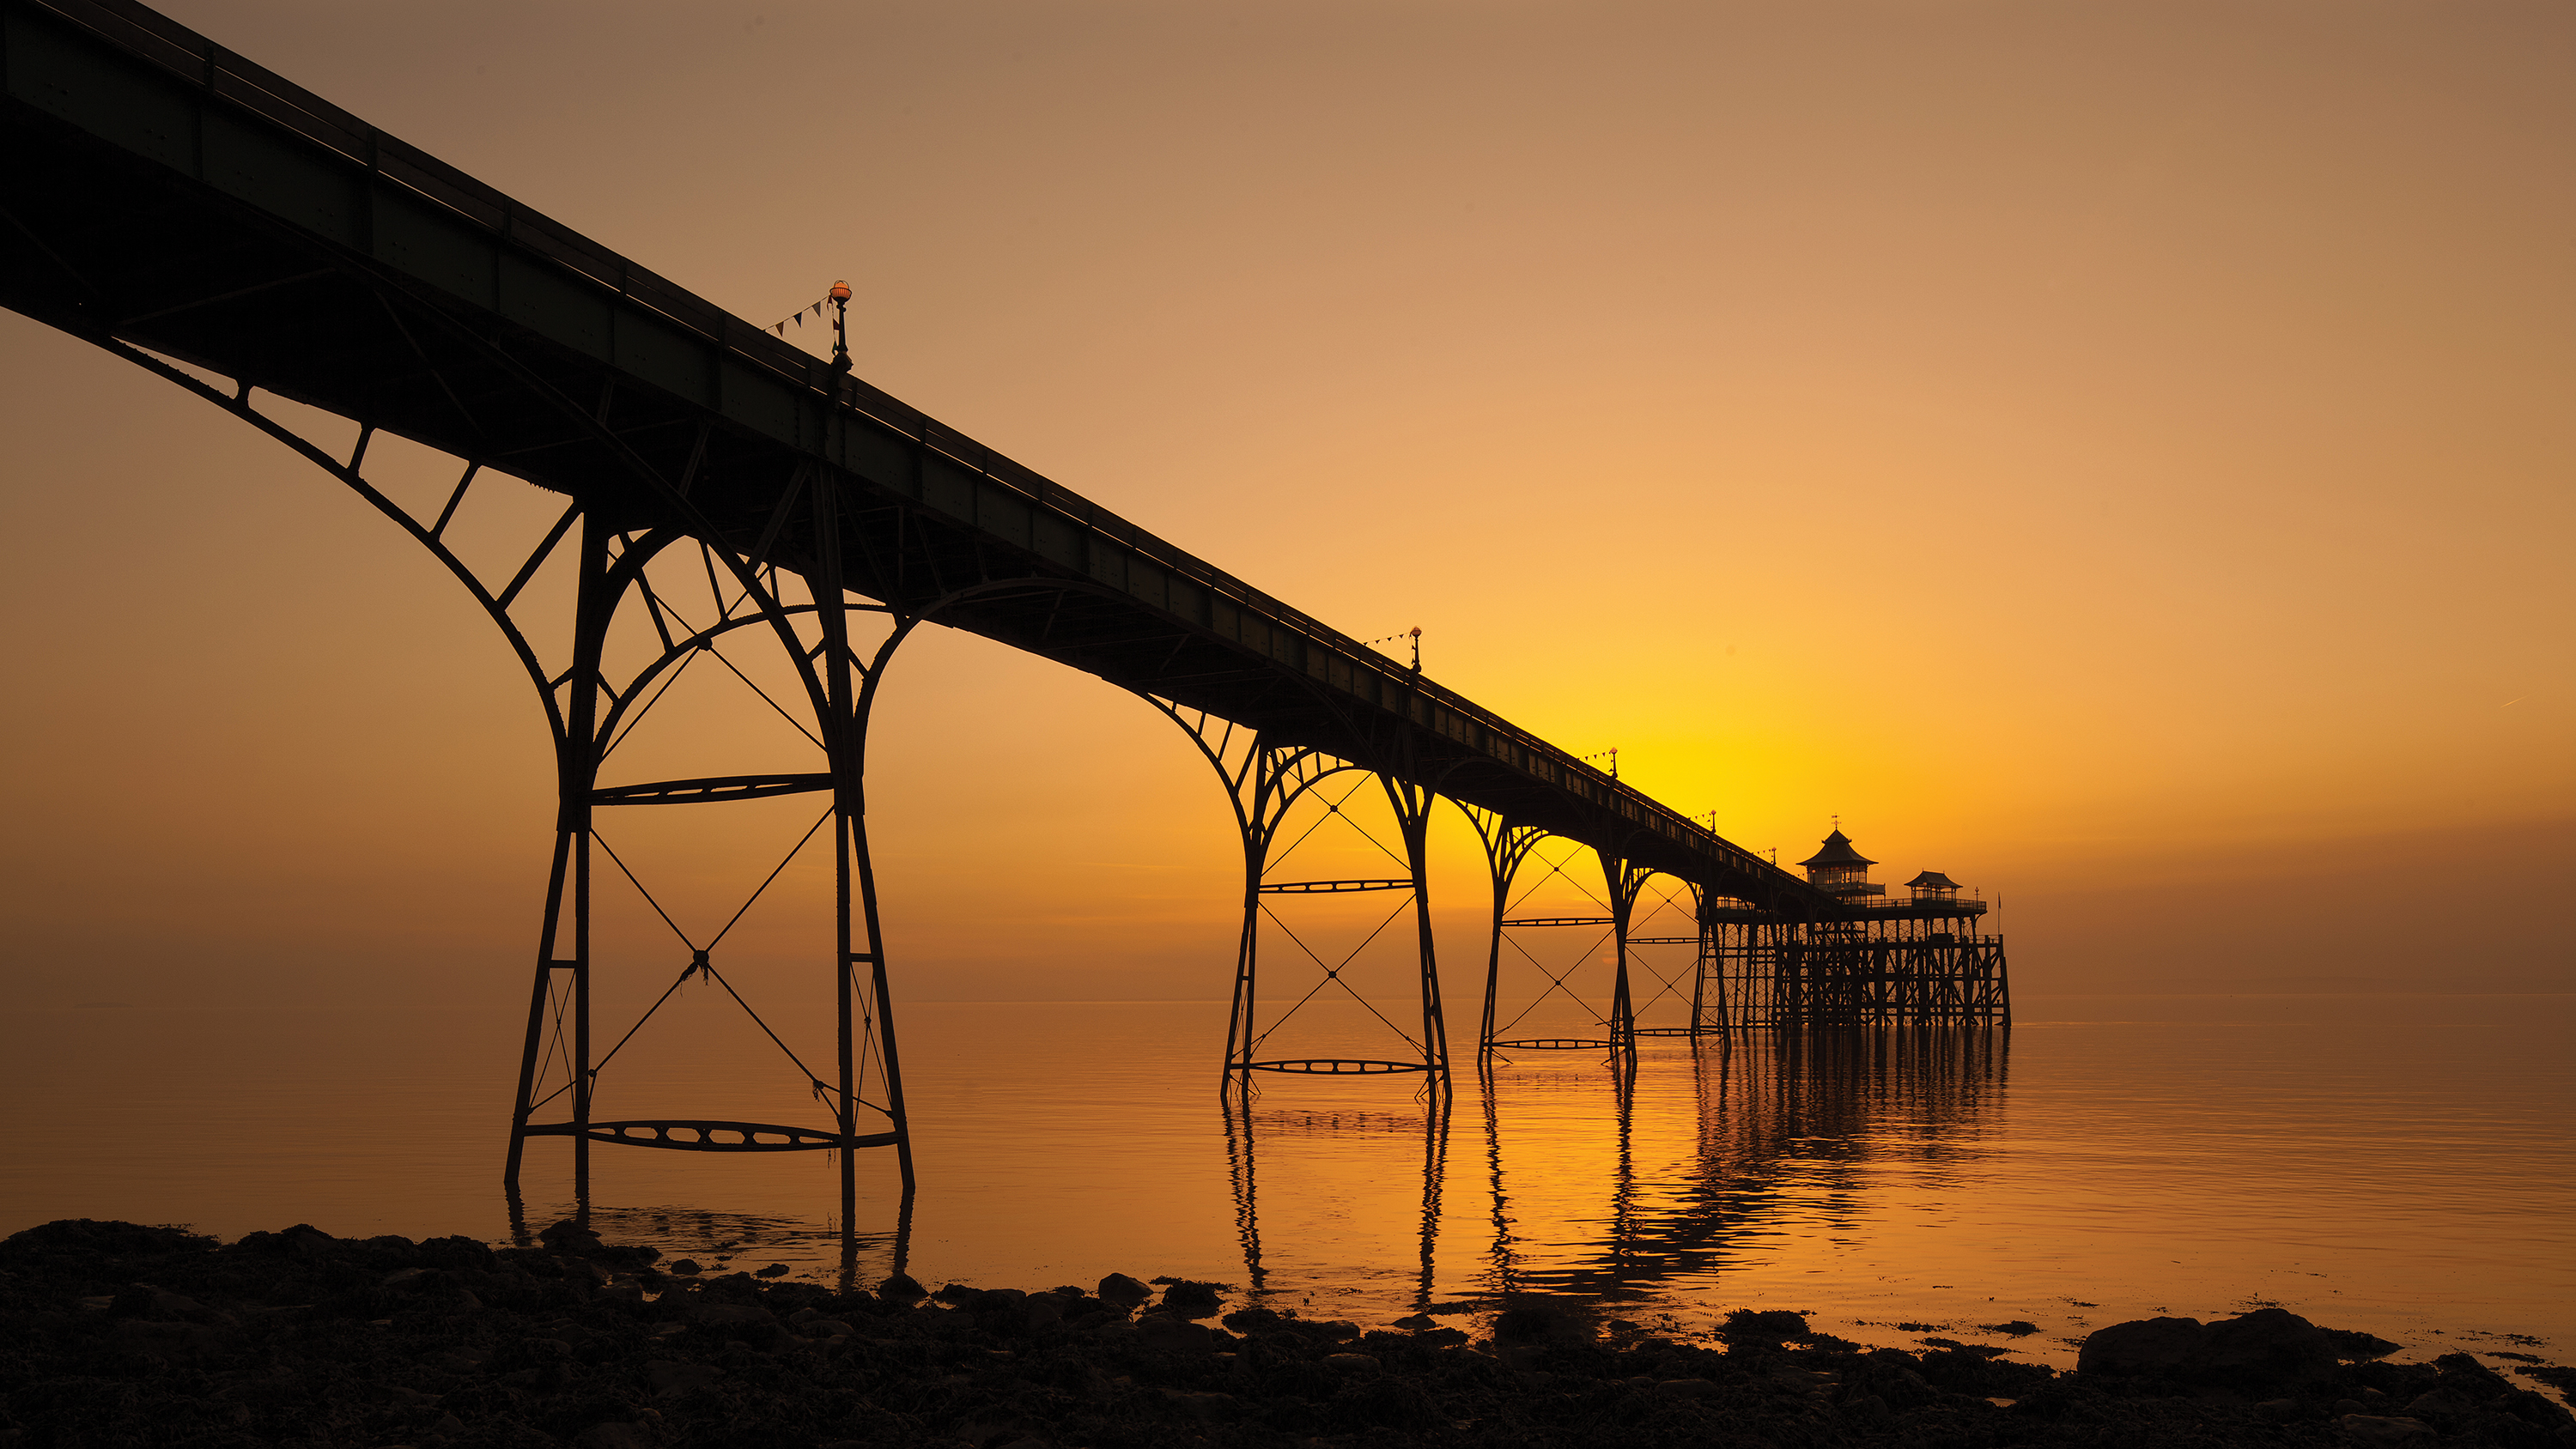
The problem is that the automobile white residuum of digital cameras volition typically try to cancel out whatever shift in colour temperature, with the aim of producing results that are more neutral. Every bit a issue, the AWB setting tin can leech all the orange light out of sunset and sunrise shots, giving rising to insipid, neutral images every bit a effect.
The solution is to switch to a preset white residual style. The regular Daylight or Sunlight setting will often yield fairly accurate results, but the best mode to emphasise the gilded quality of low-level sunlight is to change to the Cloudy white remainder setting. Moving to the Shade setting volition further exaggerate orange hues.
- Learn more: The best camera settings for sunset photography
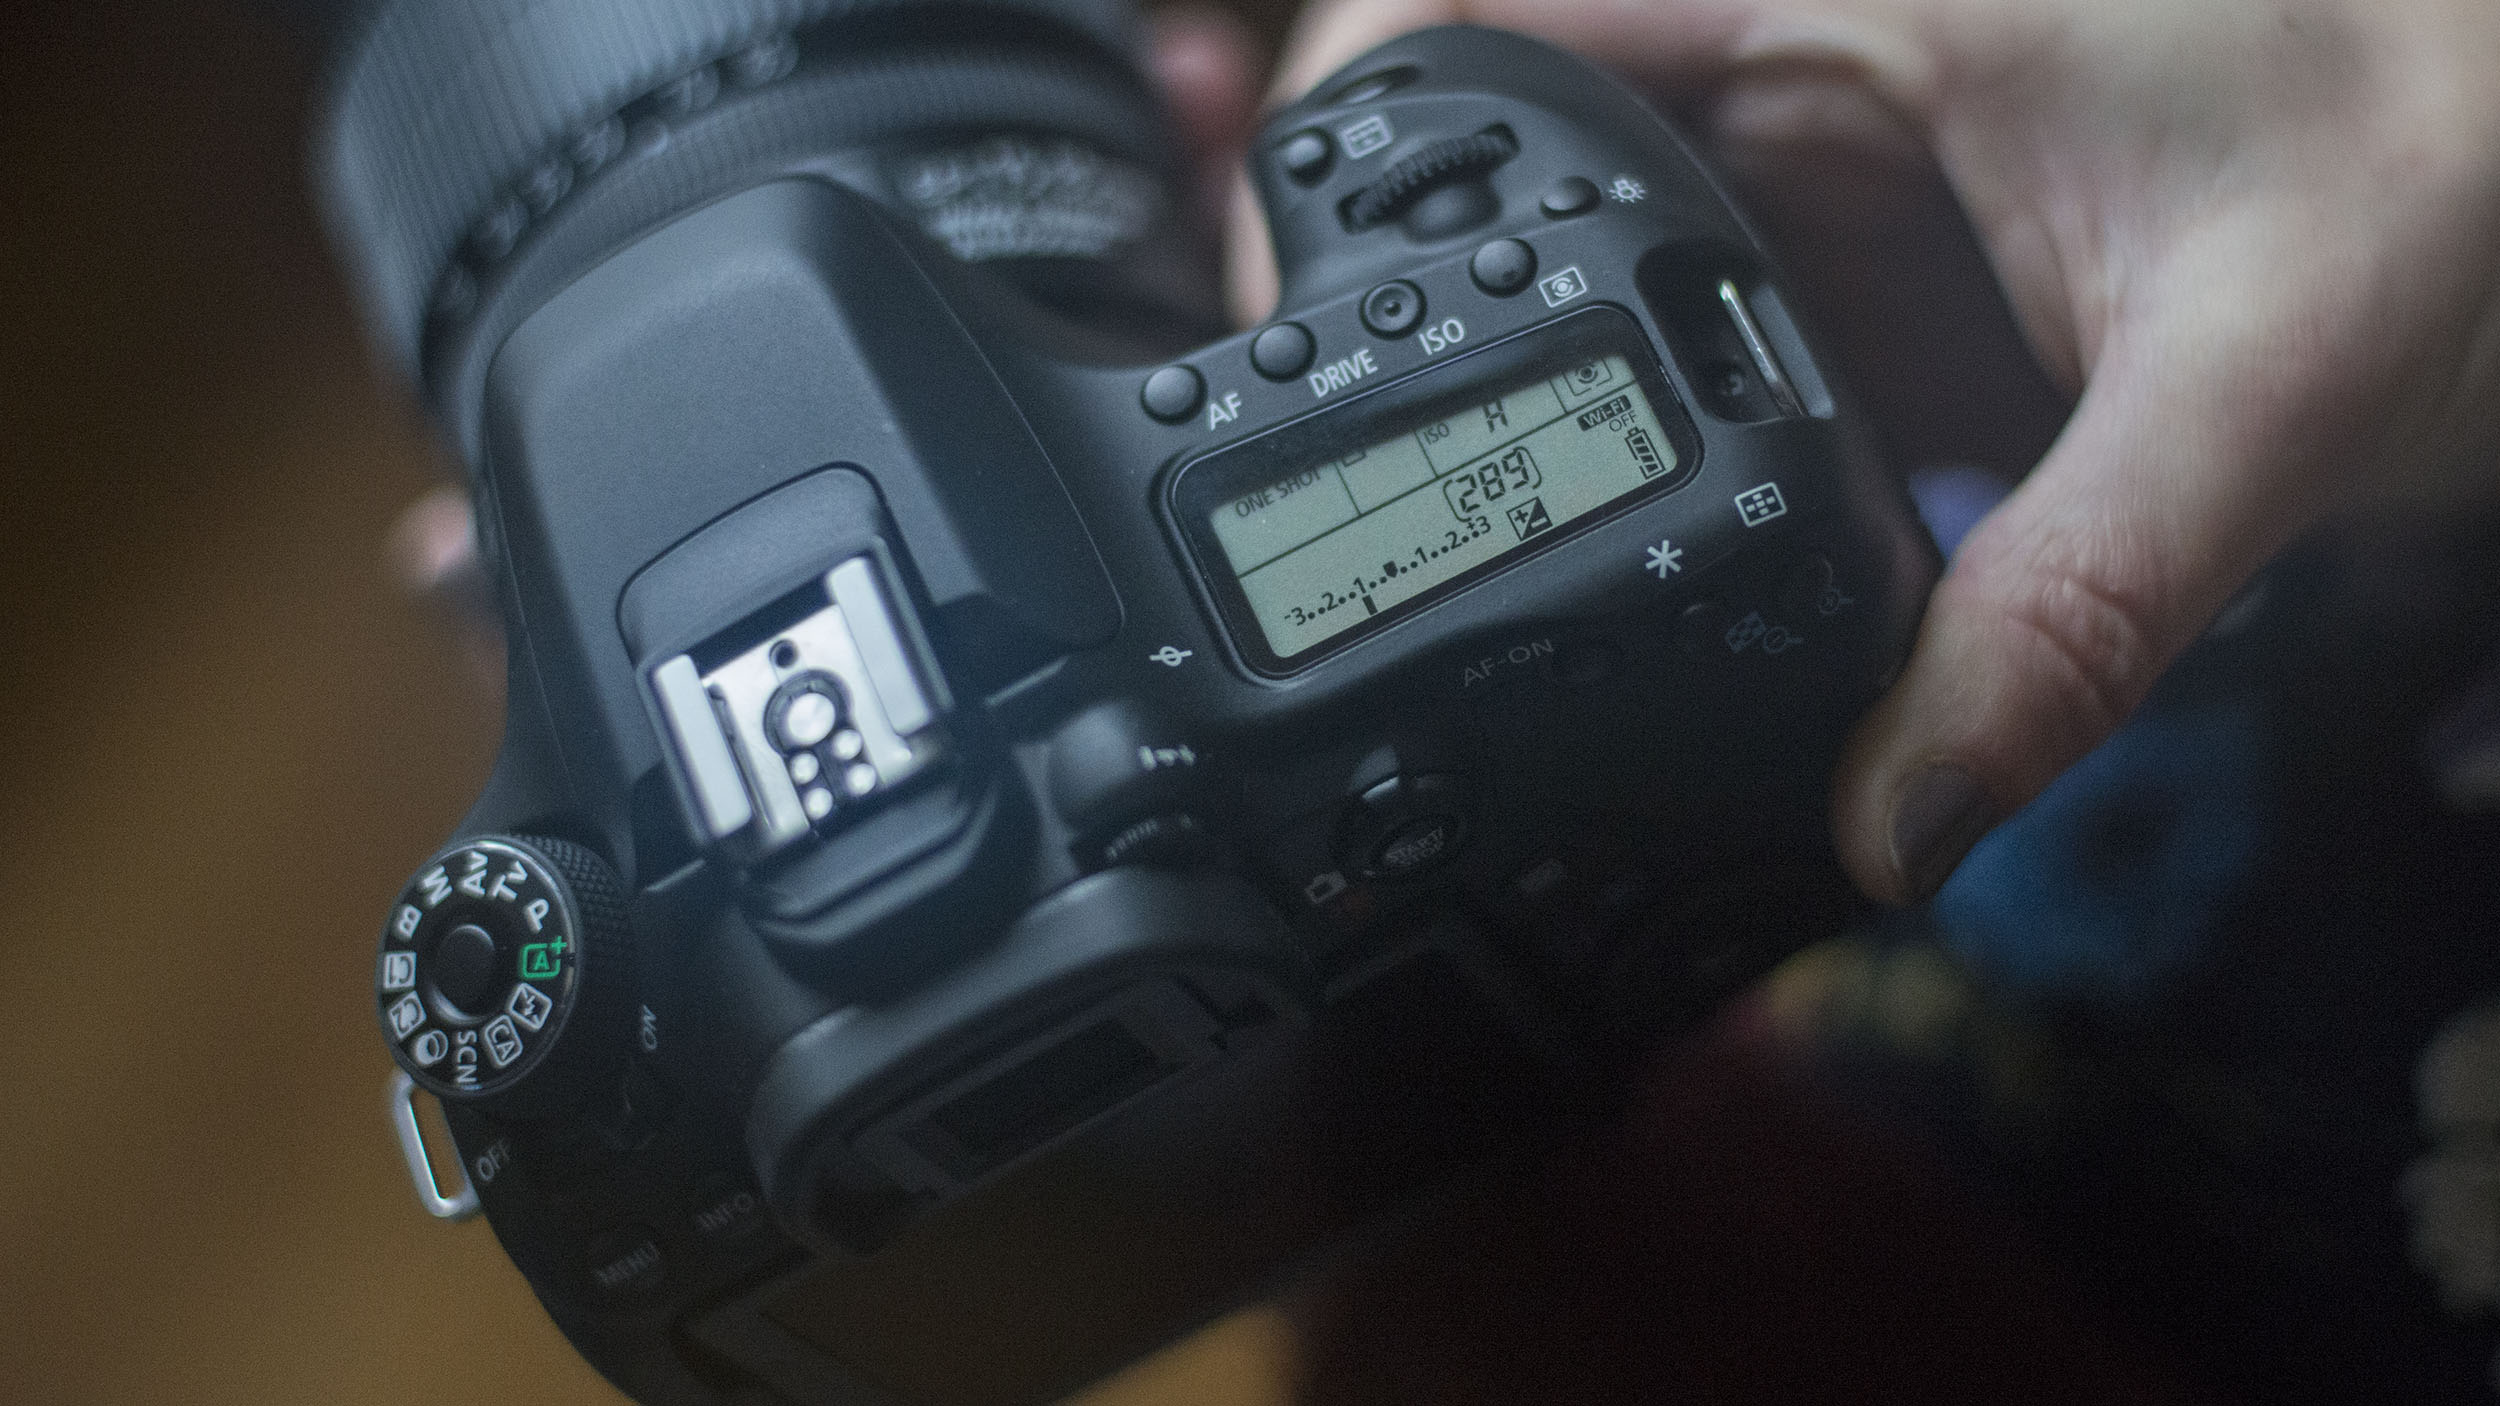
Problem No. 9: Why are some of the ISO ratings on my camera unavailable as standard settings?
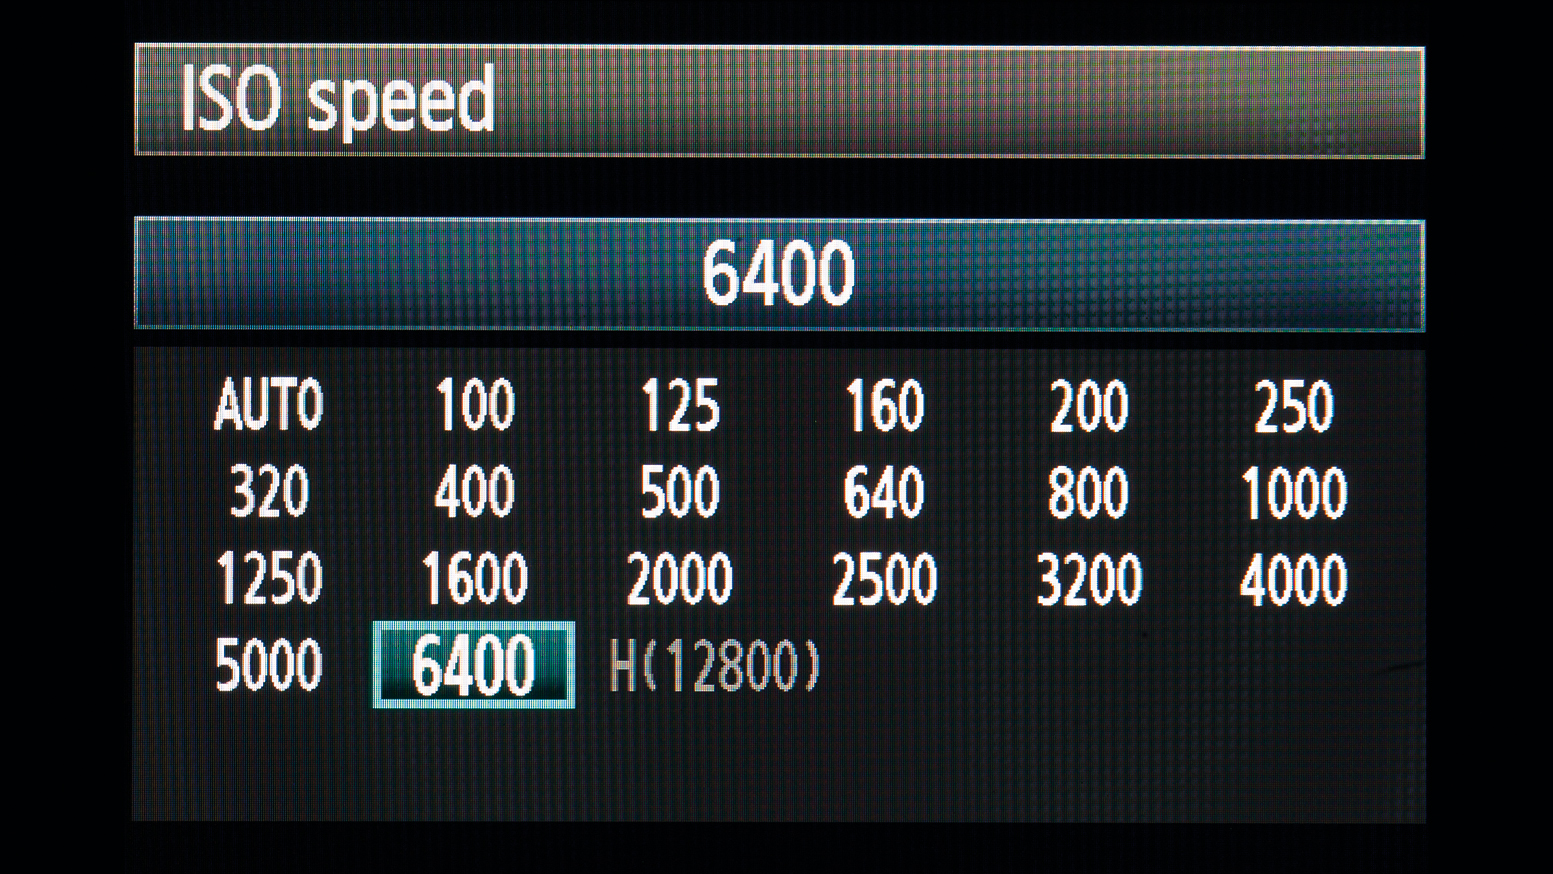
Many cameras split up their total sensitivity range into standard and 'extended' ISO sections.
This ways cameras deliver optimum paradigm quality in their standard ISO range, with maximum item and the least amount of digital epitome noise at their base ISO settings - usually either ISO100 or ISO200.
At the extended range, fifty-fifty more than 'gain' is applied (remember of it like turning the book up on a Hi-Fi, so system dissonance becomes more apparent) than in the standard ISO range, which results in more than digital grain.
This does requite you some flexibility in poor lighting atmospheric condition, but exist prepared for image quality to be noticeable poorer than if you were shooting in your camera'due south standard range.
At the other end of the calibration, low ISO settings that are one terminate below the base sensitivity of the photographic camera are sometimes available. These are handy if you lot desire to use a large aperture to minimise depth of field, or create movement mistiness with a slow shutter speed.
The trade-off is that you'll typically lose most one stop of dynamic range in the highlights, so they'll wash out to white more readily.
Problem No. 10: I've used the smallest aperture on my lens to go everything abrupt, but the picture looks soft - have I done something wrong?
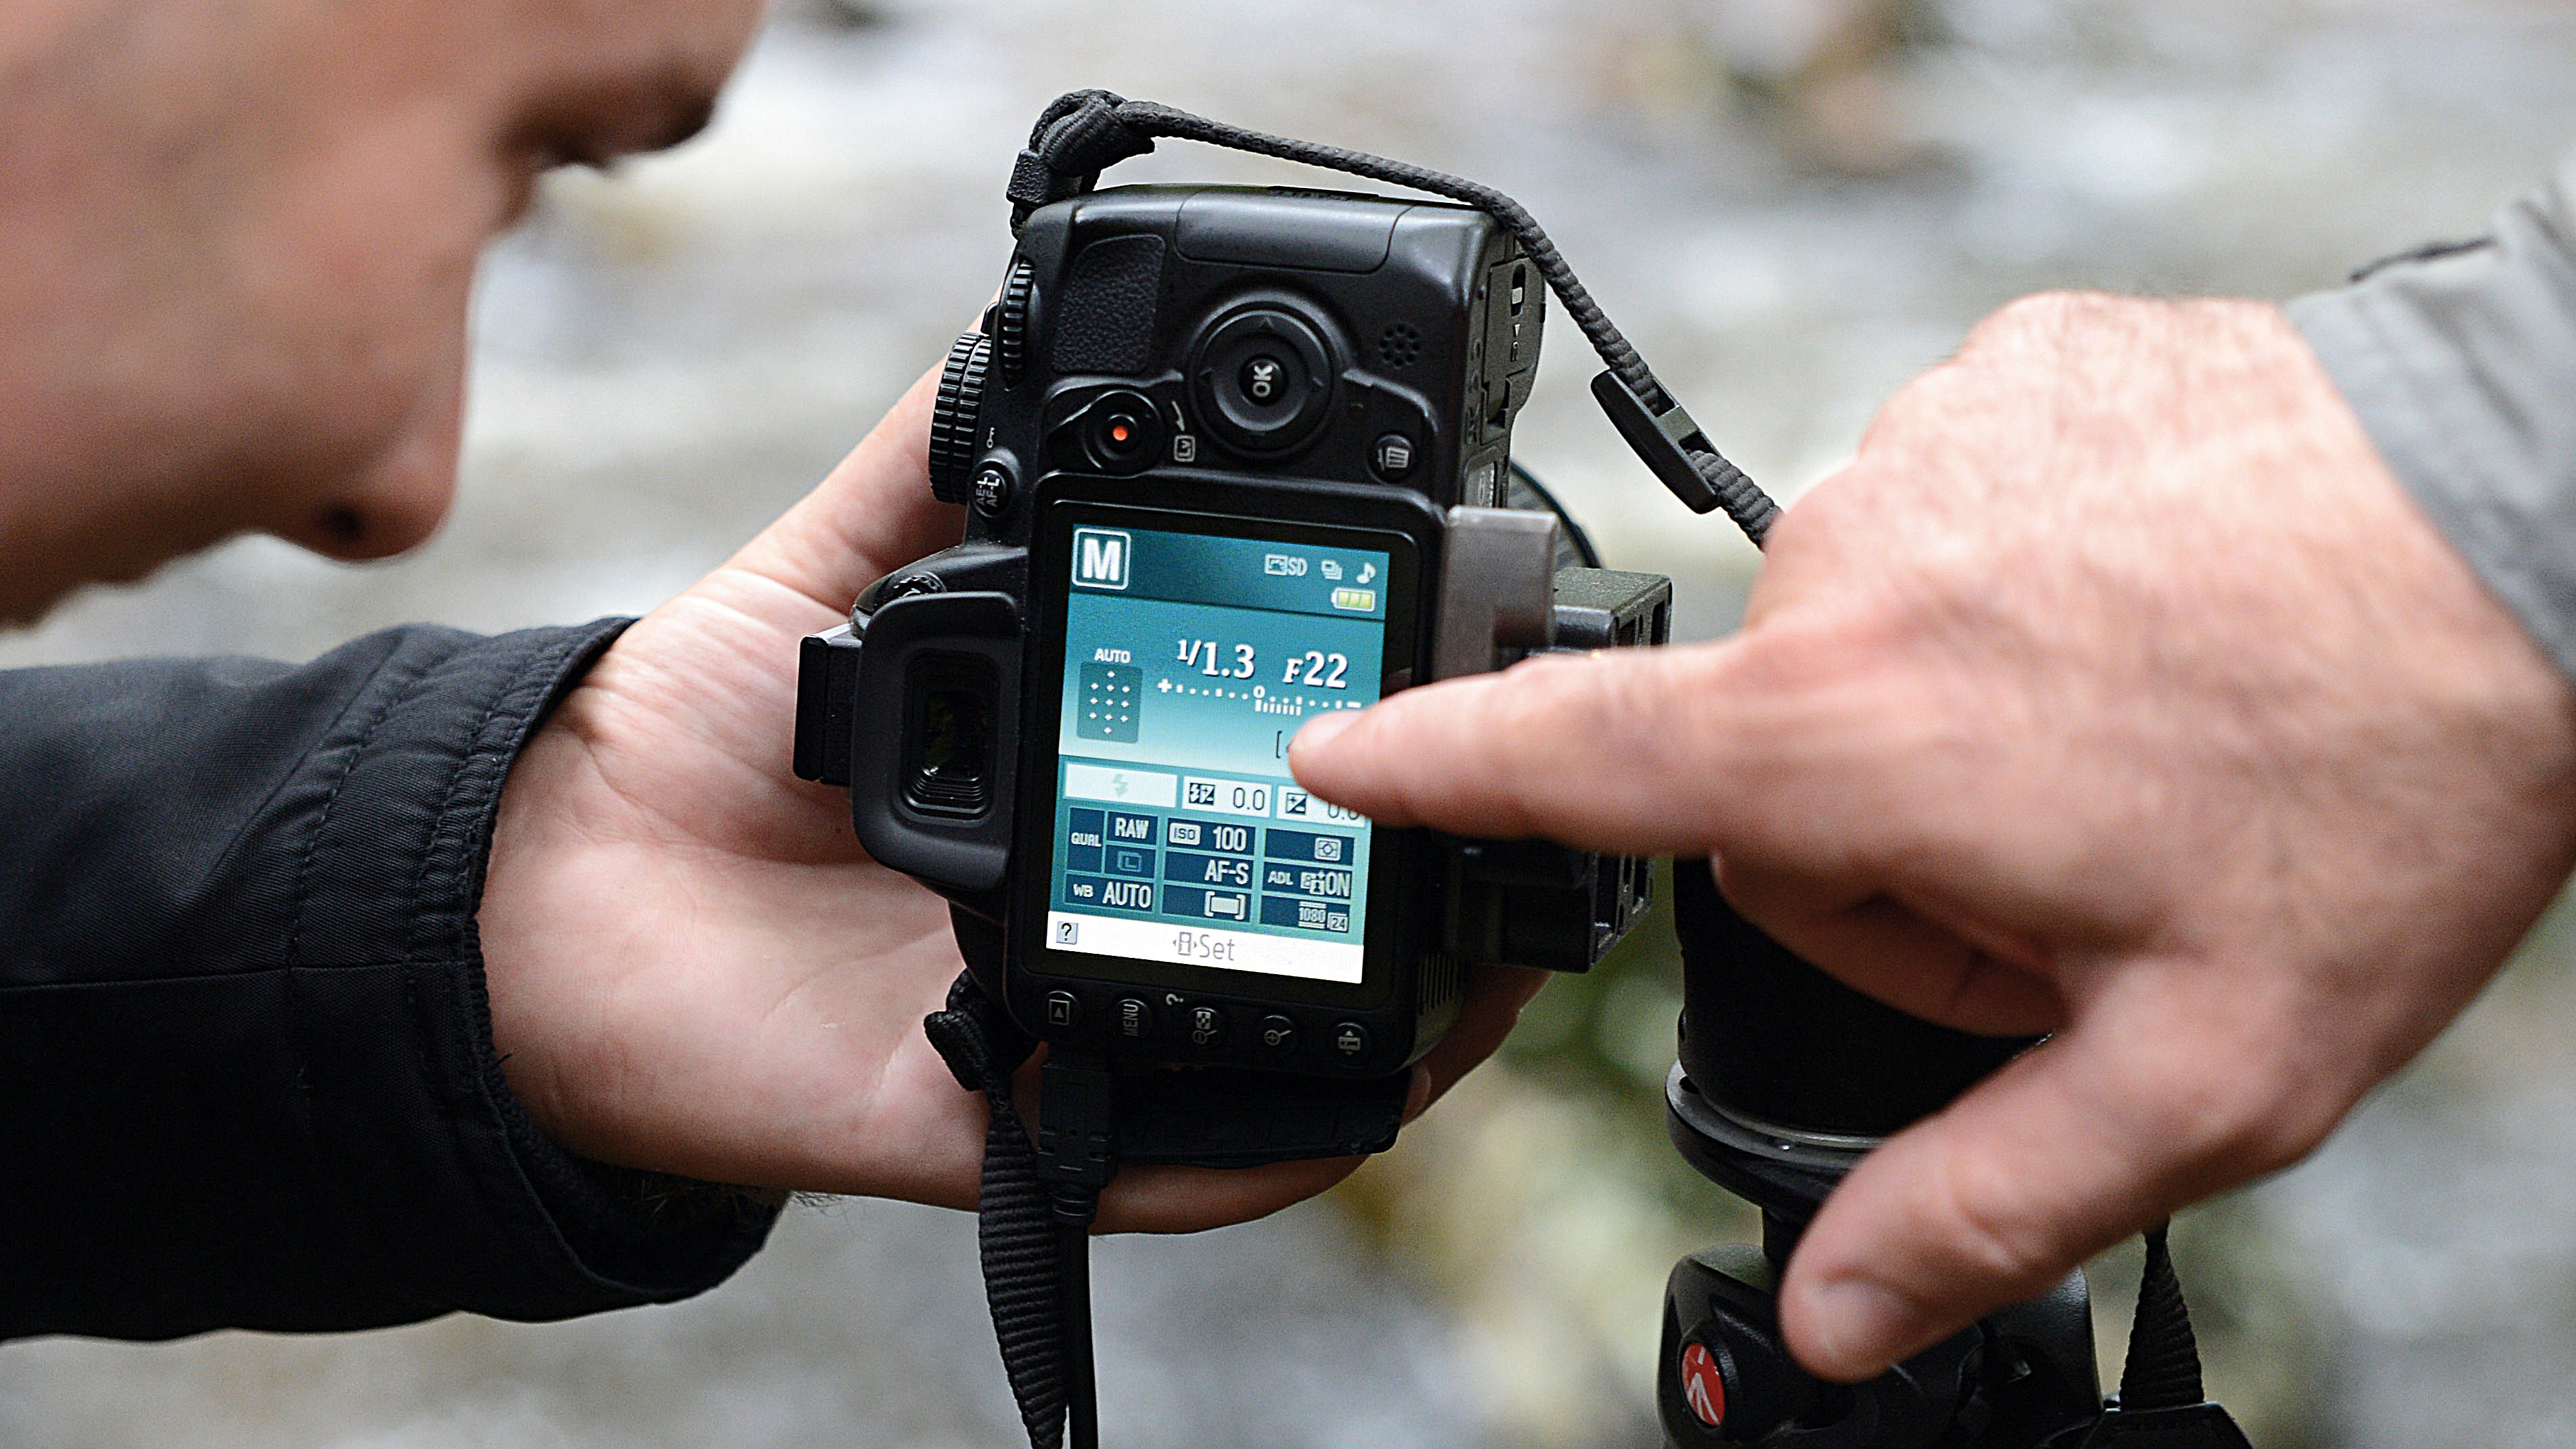
Most lenses have a minimum discontinuity of f/22, although some (such every bit macro lenses) offering an even smaller setting of, say, f/32. Merely why is the minimum aperture of a lens rarely listed aslope the focal length of a lens, equally its maximum aperture is?
This is because the smallest discontinuity is rarely recommended to exist used, as this setting leads to softer, lower contrast images caused past an optical phenomenon known as diffraction.
Diffraction occurs when light waves entering the lens are 'bent' by the hard edges of the discontinuity. Every discontinuity setting causes this, but the bending is generally minimal. However, as the apertures gets smaller, the effect becomes more significant.
At the smallest aperture, the low-cal waves are bent and spread out so much by the aperture blades that the paradigm appears fuzzy, fifty-fifty though it'south been focussed correctly.
So, while a lens's smallest aperture might enable you to maximise the depth of field when you're photographing landscapes, the resolution volition deteriorate. Try opening up a one-half or i full cease instead to improve picture show quality.
Trouble No. xi: My zoom lens says it's 'macro' but I can't get anywhere near as shut to subjects as I can with my compact camera. What's going on?
True macro lenses have a reproduction ratio of one:i, which means they tin can image a subject area the aforementioned size equally the camera's sensor; on most DSLR and mirrorless cameras, this is nearly 24 x 16mm. Many 'macro' zooms avowal ratios nearer i:4, so the smallest possible subject is near credit-card size.
Information technology'due south true that many compact cameras practise allow shut focusing, but they simply do so with the lens at its wide-angle setting. So the smallest subject area they can capture isn't as small as you might think. It can as well be hard to become enough light on the subject, which ends upwardly in the photographic camera'south shadow. A slightly longer working distance is much more applied.
- Larn more: Macro lenses: how to choose one, and how to employ information technology
Problem No. 12: Some of my shots are blurred, specially at longer zoom settings. How do I avert information technology?

Camera shake is something that becomes more problematic with longer focal lengths. The easiest way to avoid it is to utilise faster shutter speeds, even if this requires increasing your photographic camera's sensitivity (ISO) setting.
A general dominion of pollex is that the shutter speed should be faster than the focal length you're shooting at, so for case, if you lot're shooting with a 200mm equivalent lens, yous shouldn't shoot any slower than 1/250 sec or y'all risk camera shake ruining your shot.
Image stabilisation can also exist a big aid in reducing camera milkshake. With a 4-finish stabilizer you lot can expect consistently good handheld results when using a 400mm lens even when reducing the shutter speed from i/500 sec to 1/30 sec.
- Learn more: 10 reasons why your photos are blurry
Problem No. 13: Which autofocus fashion should I use?
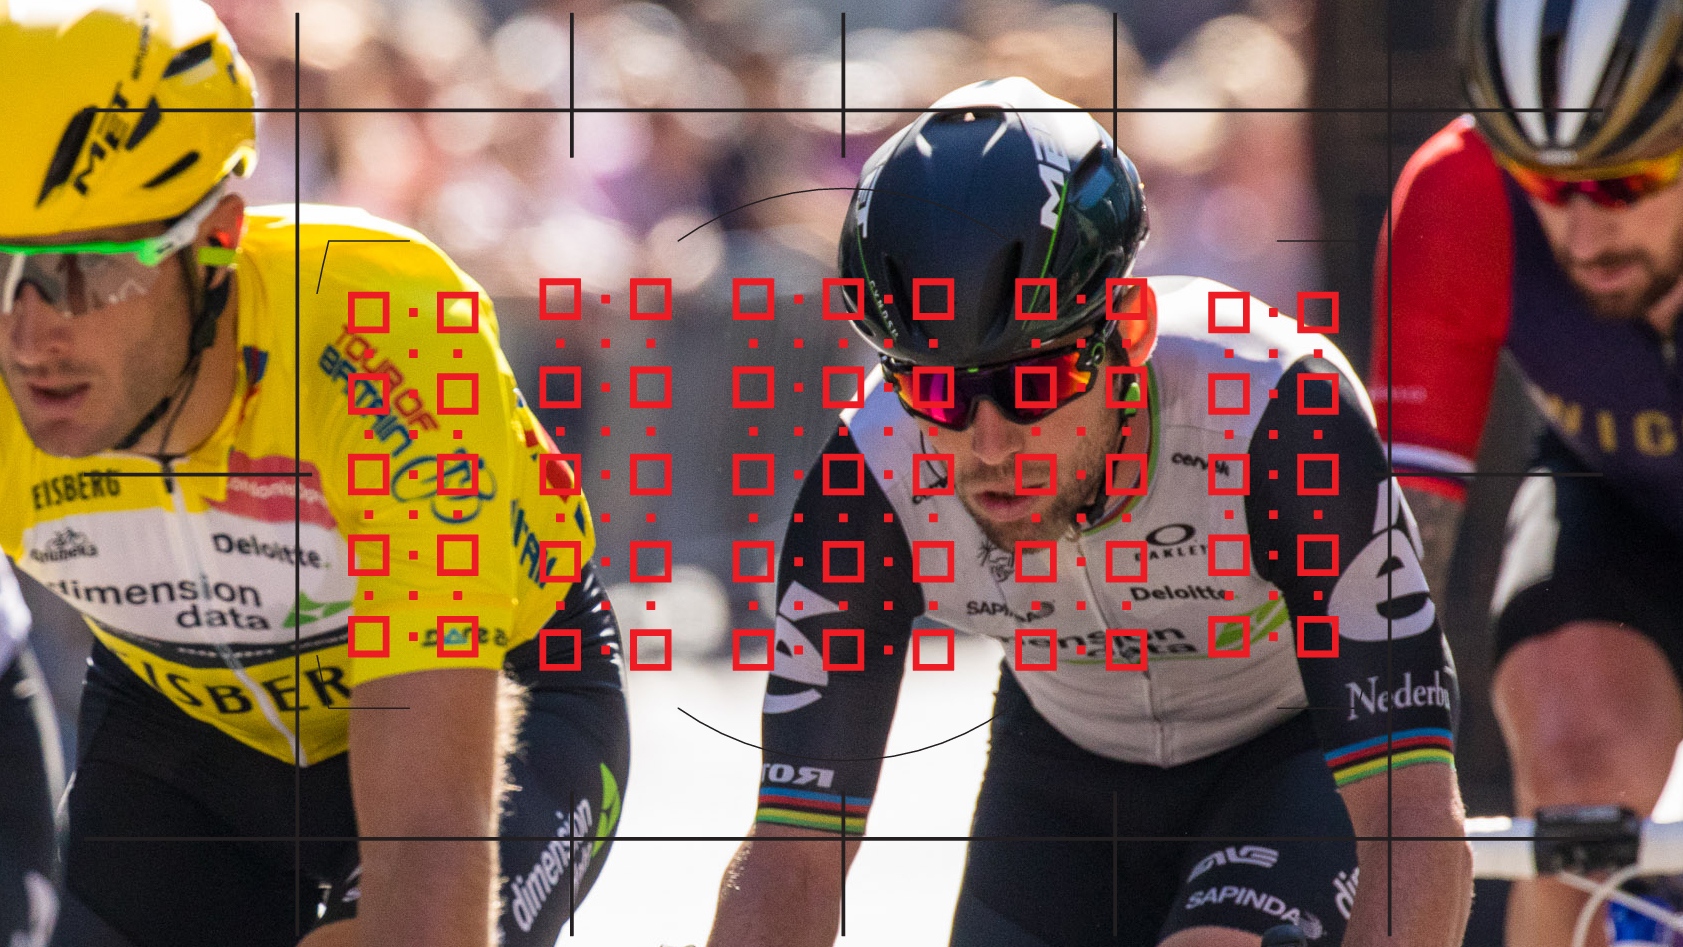
Most cameras featurre two basic autofocus (AF) modes: Single and Continuous (though Canon helpfully calls them One-shot and AI-Servo).
For full general shooting, single mode works best because autofocus locks onto its target when yous apply a light press to the shutter release push and remains fixed while yous maintain the light printing, until fully pressing the button to take your shot.
Continuous autofocus mode is better for moving targets, because focus continually tracks subjects, though how successful that will be is dependent on the sophistication of your camera's AF system.
- Acquire more: 10 surefire ways to get your sharpest-always shots
Problem No. 14: I notice manual focusing quite difficult. Is in that location a style of getting more precise results?
If y'all're using a DSLR, try and avoid using the optical viewfinder, and instead utilize the camera's rear brandish to frame shots and focus manually. You'll find most cameras feature magnification options for really precise focusing.
Some cameras as well feature a Focus Peaking, with areas in-focus highlighted on the camera's brandish (or electronic viewfinder).
- Acquire more: Discover how to master transmission focus
Problem No. 15: If my photos are coming out too light or besides nighttime, how do I ready them?
This is where the exposure compensation office of your camera comes in. By pressing the push marked '+/-' and rotating your photographic camera's control dial, you lot tin correct the meter'due south interpretation of the scene.
Your camera'southward exposure level scale, measured in stops, is visible in the viewfinder and LCD screen(s), and this is your visual guide to getting it right. The marker in the eye of the scale represents the 'right' exposure, according to the exposure meter. Every bit you rotate the dial, you'll run into an indicator mark move upward and downward the calibration.
When it moves towards the '+' terminate of the scale, you're making the prototype brighter; turn the dial in the other direction and the marker moves towards the '-' terminate of the scale, making the picture darker.
If y'all're using an optical viewfinder, you won't see this change happening to the prototype every bit you exercise this, but the effects of exposure bounty are simulated in live view and electronic viewfinders (EVFs).
Of grade, the amount of compensation yous may need to employ depends on diverse factors, such as the tone of the subject, the lighting and the type of metering being used.
- Learn more: The A to Z of Photography: Exposure compensation
Problem No. 16: In many of my landscape shots, either the ground is besides nighttime or the heaven is besides bright. What am I doing wrong?
Stake skies are normally much brighter than the land, then if the footing is correctly exposed the sky will wash out. This is because the dynamic range (the range of calorie-free intensities from the darkest shadows to the brightest highlights) of the scene is wider than what the sensor tin capture in a single shot.
The simplest solution is to utilise a neutral density (ND) graduated filter to residual the exposure - you can read our guide beneath, otherwise, shoot in raw and information technology tin be possible to recover lost detail in the heaven. Try and nether-expose the scene slightly to retain highlight item.
- Buying guide: Best ND grad filters: half-dozen top models tested
Problem No. 17: I've often seen examples of these long exposure landscapes, only I tin can never seem to become a sufficiently slow shutter speed. Can you help?
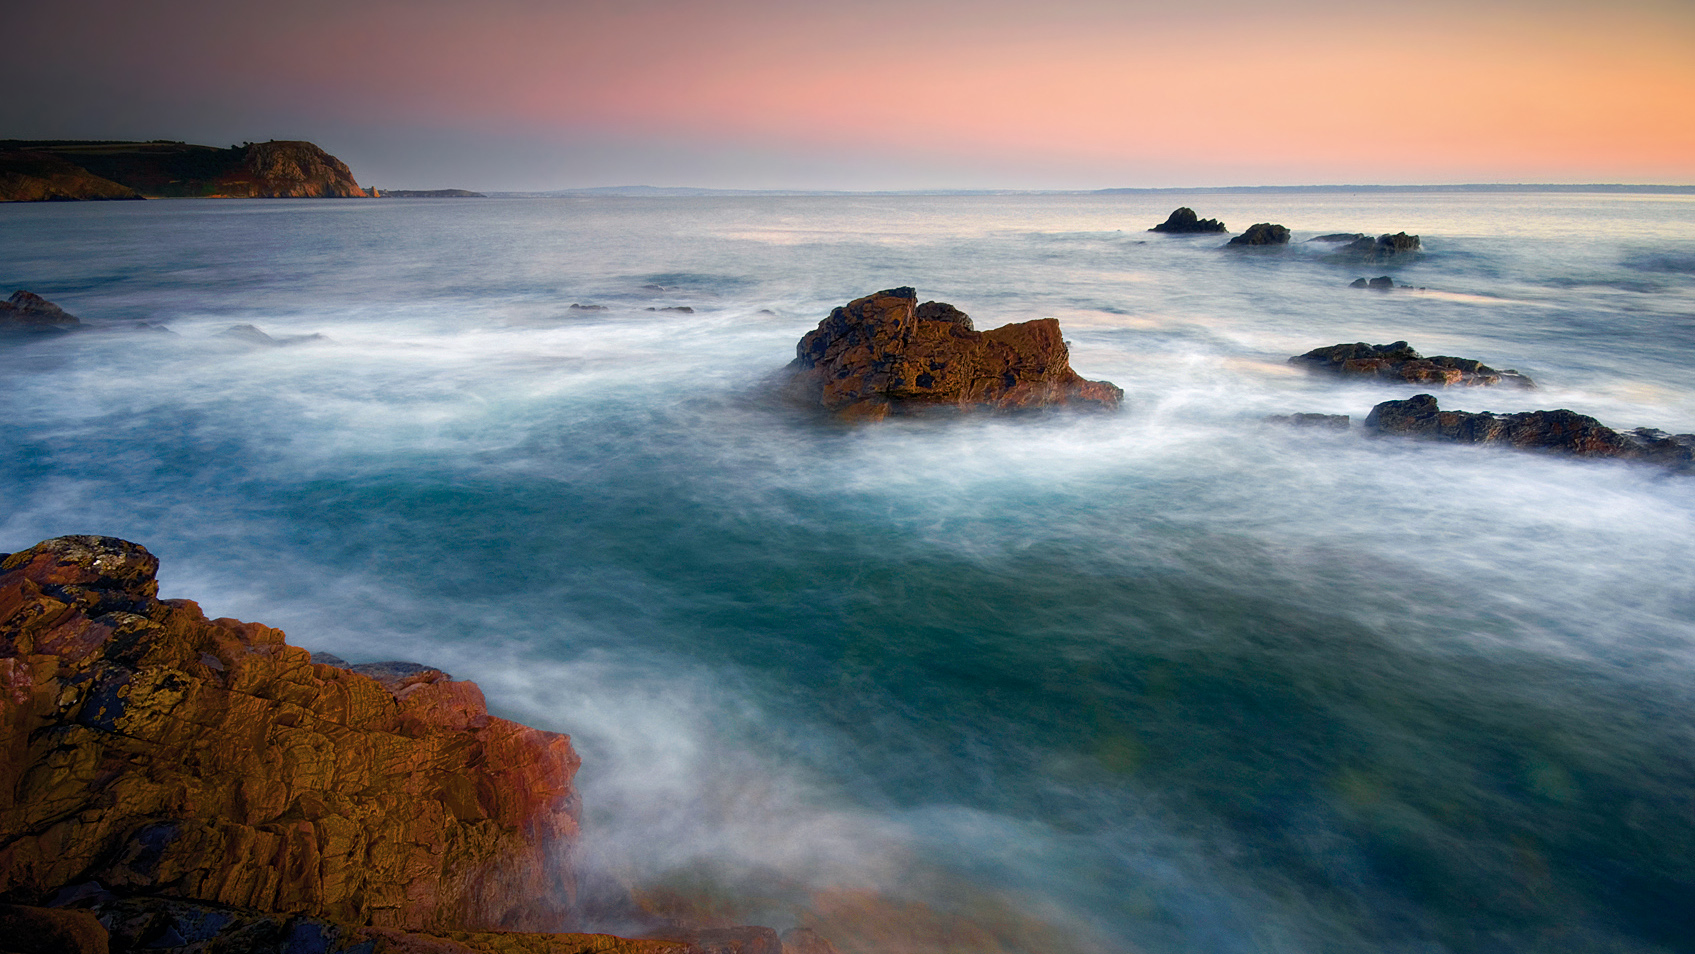
For slow shutter speeds in daylight, you'll need to use a narrow aperture of around f/sixteen or f/22, only even at ISO100, this may exist insufficient to enable a long exposure. The fob is to utilise a neutral density filter. These vary in strength, simply can turn a exposure that would concluding less than a second into one taking longer than 30 seconds.
- Buying guide: Best ND filters: 6 top models tested
Problem No. 18: When I playback images on my photographic camera'southward LCD screen, parts of them are flashing - is that a fault?
This is simply a 'highlight alert' characteristic that is usually activated or deactivated via the camera'due south playback carte. With it switched on, areas of the picture that are (or are close to being) overexposed will wink or blink betwixt black and white.
This warning enables you to instantly meet, for example, if yous've lost all the item out of the sky or other very light areas in an prototype. It's very useful when you're trying to retain highlight detail, equally you can punch in some underexposure compensation and re-shoot.
Trouble No. xix: Why practise my wink shots keep coming out dark?
The most likely explanation is that y'all're trying to shoot subjects that are too far away. Flash has a limited range, and born units are weaker than external flashguns.
Problem No. 20: How can I get meliorate looking portraits on sunny days?
Sunshine is the enemy of portraiture, as it creates a hard and unflattering light. When the sunday is low in the sky, people will squint, and when information technology's overhead, there will exist deep shadows that plough their eyes into blackness holes.
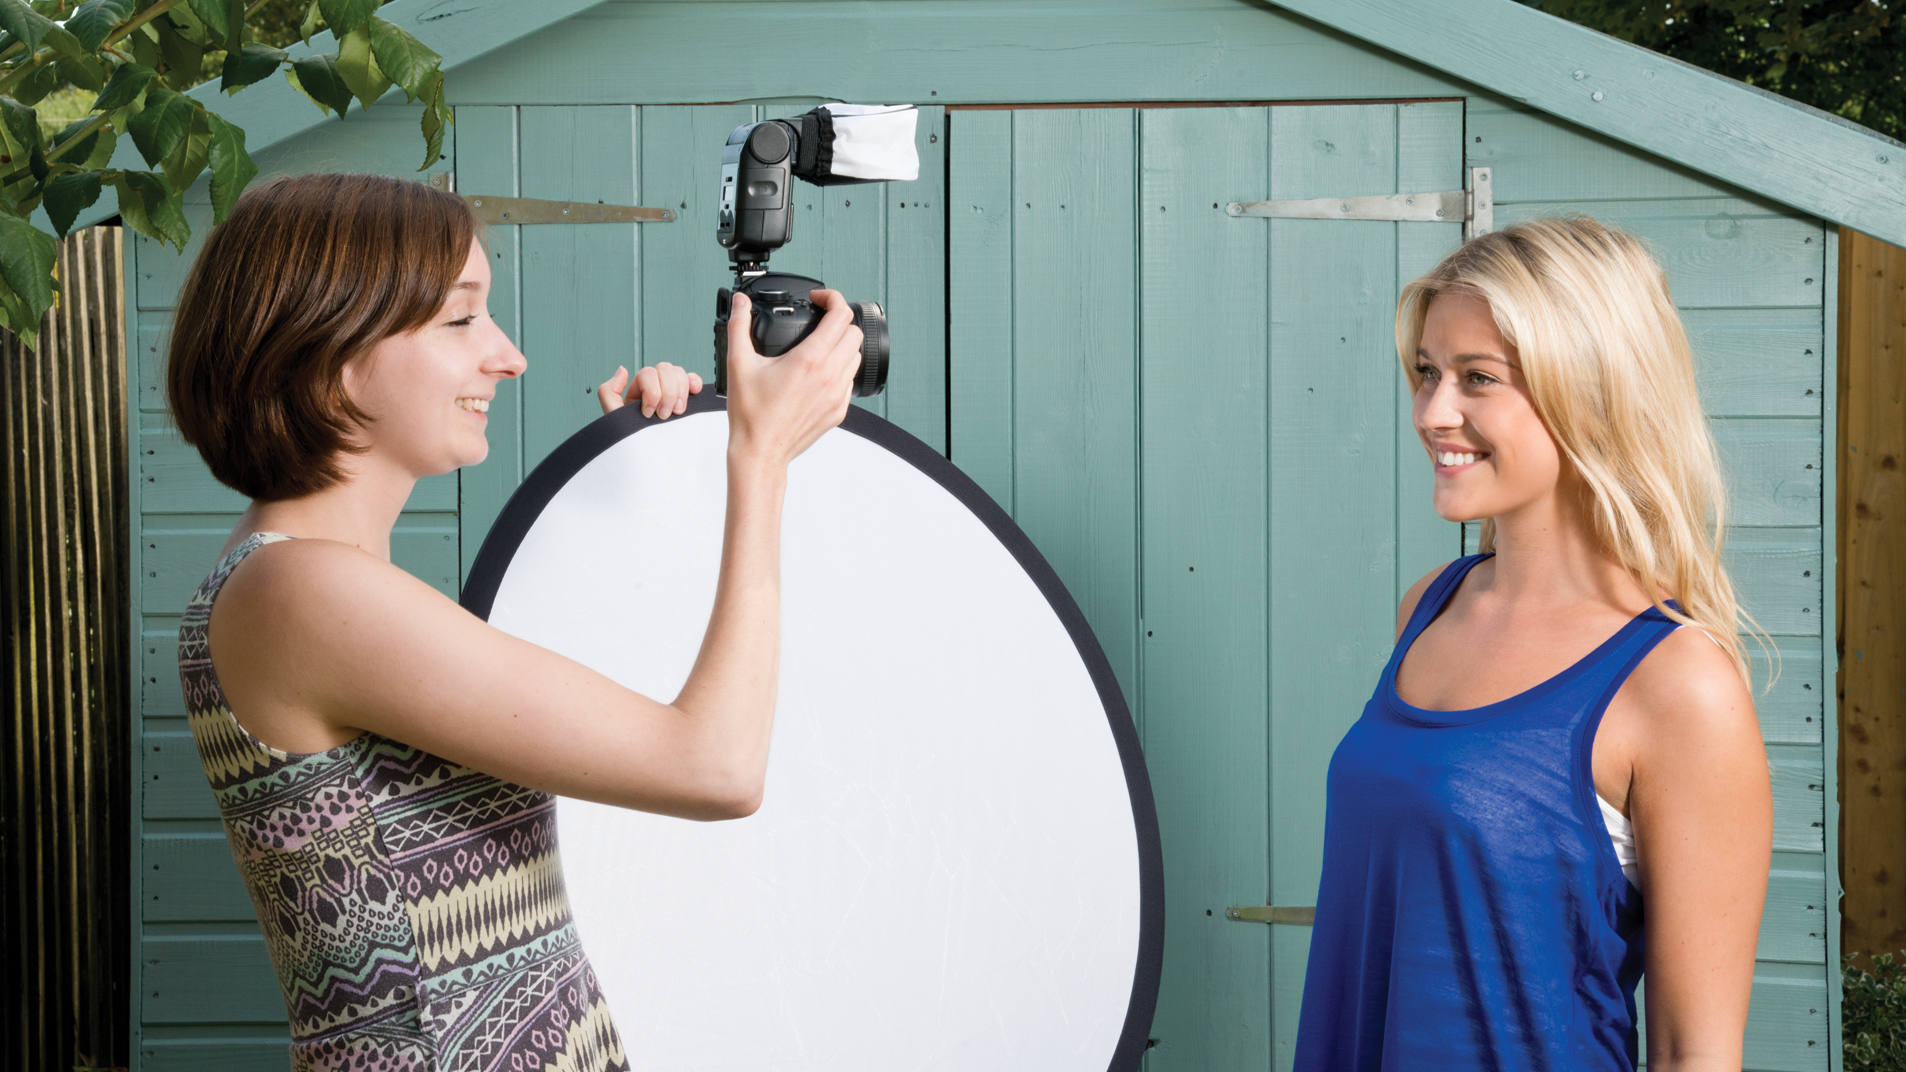
The answer is to get your bailiwick to turn away from the sun, and then they can pose naturally, and to utilize fill-flash to blackball shadows. When using a flashgun with TTL (Through The Lens) metering, about cameras will practice a decent task of balancing flash light with ambient light, giving fairly natural results.
Use the camera'due south metering system every bit a guide, but don't exceed the maximum shutter speed for wink synchronisation - the flash sync - typically around 1/200 sec. The TTL flash exposure system should enable the right amount of illumination for fill-flash, merely exist prepared to punch-in some positive or negative flash exposure compensation. For ultimate command, switch to manual power settings on the flashgun and accommodate the power for the best balance.
Another good option for natural-looking fill flash is to utilize the flashgun off-photographic camera, holding information technology high and to i side of the subject, using an extension cord or wireless connection.
- Learn more: Wink photography made easy: from unproblematic shots to avant-garde techniques
Problem No. 21: When I take photographs of buildings, walls and roofs announced to bow outwards. What am I doing incorrect?
This is most likely acquired past photographing these buildings from a fairly close distance, using a wide-angle zoom setting. Wide-angle focal lengths can result in noticeable barrel distortion, making the top, bottom and sides of the building appear to bow outwards.
You lot'll too need to indicate the photographic camera upwardly, which accentuates perspective and makes the sides appear to lean in towards each other towards the top. The solution is to continue your distance and then yous tin apply a moderate zoom setting of around 35mm (50mm on a full-frame photographic camera).
For photographing tall buildings, it'due south ideal if yous can discover a vantage point that'southward higher than ground level - such as some other building. You could apply perspective correction when editing, but you'll lose part of the frame, so exit plenty of space around the edifice when shooting.
Problem No. 22: In all of my panning shots the background is besides abrupt or everything's blurred. Tin you give me whatever tips?

It's difficult to detect a shutter speed that's slow enough to create motion blur in the background merely fast enough to stop unwanted camera shake blurring the car or bike that y'all're shooting.
Behave in heed that you'd normally aim for a shutter speed of most 1/500 sec to avoid photographic camera shake when using a 300mm lens.
To create attractive motion blur in the background, you lot need a much slower shutter speed of about 1/60 to 1/125 sec, so developing an effective panning technique is a must. To get panning right, place your feet comfortably far apart, so that when you're facing frontward you're aiming at the position the vehicle will be in when you shoot it.
As the discipline passes, hinge from your hips rather than your upper body as smoothly as possible, and gently squeeze the shutter button rather than stabbing at it. Proceed the panning movement for equally long as possible, fifty-fifty after you've taken the shot.
It does take a look of trail and fault, and then don't surrender if it doesn't work commencement time out.
- Acquire more: 9 tips for taking sports photos similar a pro

Phil Hall is an experienced writer and editor having worked on some of the largest photography magazines in the United kingdom of great britain and northern ireland, and now edit the photography aqueduct of TechRadar, the UK's biggest tech website and i of the largest in the world. He has also worked on numerous commercial projects, including working with manufacturers similar Nikon and Fujifilm on bespoke printed and online camera guides, equally well equally writing technique blogs and copy for the John Lewis Technology guide.
rooseveltgoist1945.blogspot.com
Source: https://www.techradar.com/how-to/common-photography-problems-and-how-to-fix-them
0 Response to "Why Do My Digital Photos Look Great on the Camera but Not When I Upload Them to Computer"
Postar um comentário